Tuesday, January 26, 2016

One Box Challenge


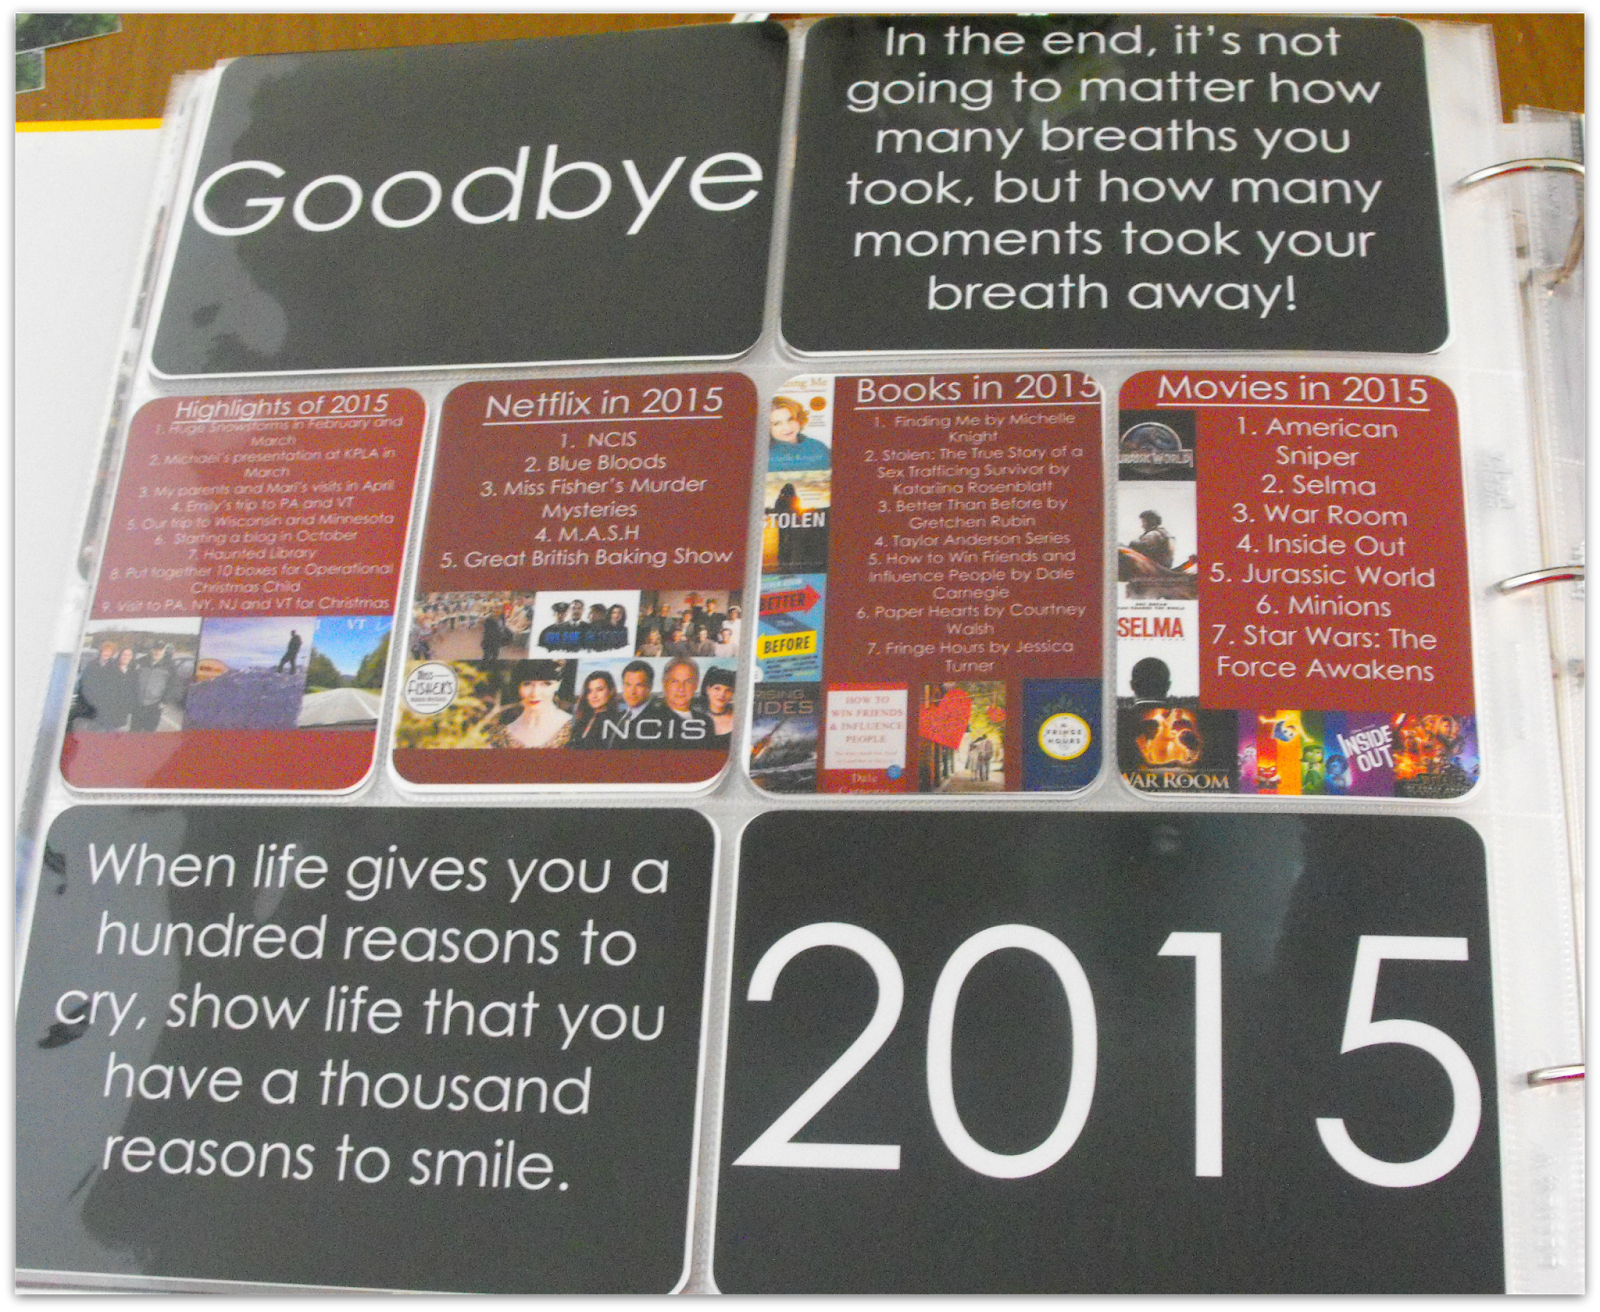
Rachel over at Sweet and Simple Home issued a challenge to take a box and fill it with items from around your home that you don't use anymore. I am always up for a good challenge, especially when it has to do with decluttering! On the 31st of January, Rachel and other YouTubers will be posting videos of what items they are getting rid of.  I will post links at a later date. I can't wait to watch these videos and be encouraged by others and their decluttering journey. 

I first tackled my closet and was so inspired that I continued throughout the house. Over the course of the weekend I removed six trash bags of garbage from around the house. I consider myself to be relatively organized, but I was surprised with how much junk was lying around.

In addition to the garbage bags, I also found a large selection of items that I don't use, but I know might be useful to someone else. So here are a few items that I am donating to our local thrift shop. 
1. Post Bound Scrapbook Inserts  2. Two Coloring Books: I had three of the same! 3. Plastic Binder 4. Jump Rope 5. Ice Scraper  6. Shark Finger Puppet  7. 4x6 Scrapbook Paper Pack  8. Command Hook
9. Books
10. Flimsy arm sling 11. Bags that sheet set came in 

12.Cookie Cutters
13. Games
14. Plate 15. Pizza Stone  15. Apple Slicer  16. Steamer Tray  17. Scraper
18. Expired Coupons from 2014
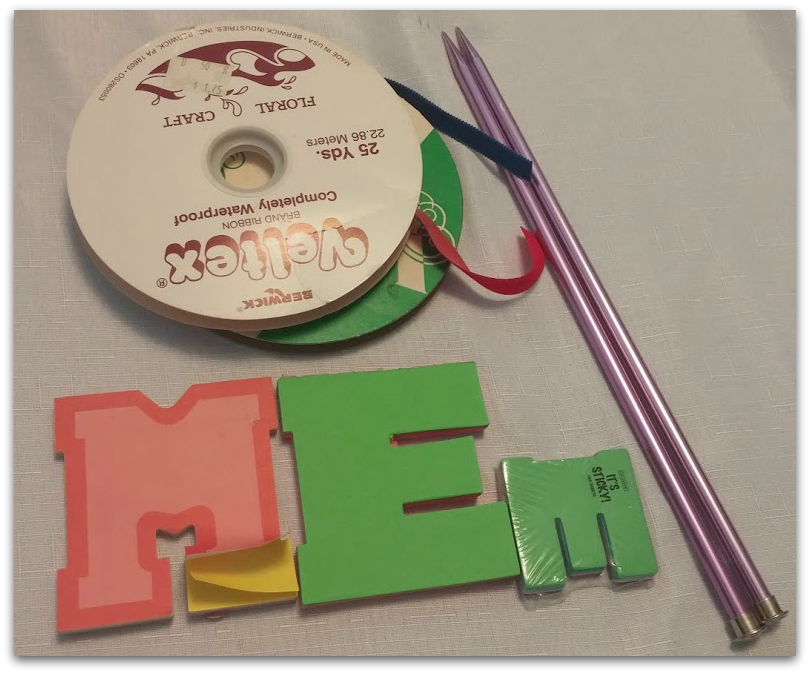
19. Ribbon  20. Knitting Needles  21. Letter Memo Pads
22. Large Stamps

23. Mini Stamps


This was only a small selection of items that I'm donating. It is so freeing to part with items that you no longer use.  A lot of times people feel guilty getting rid of things. They think about how they might need it someday. There should be no guilt in discarding those things that you don't use anymore and that are just taking up space in your home. 

Are you in the process of cleaning, organizing and decluttering your home? 
Here are a few helpful links

5. Spark Joy by Marie Kondo-Book I am currently reading

Thursday, January 21, 2016

Super Simple Mail Organizer


The new year always brings out my desire to organize and diminish clutter. Almost the moment we arrive home from our Christmas vacation I am motivated to get rid of the old and bring on the new.

Our mail system, or well honestly our lack of a system had been bothering me for quite a while. We had a beautiful wooden two-level mail tray that we purchased from a thrift store a few years ago. While it was beautiful, it wasn't user friendly. All the mail and paper work just got thrown in and was a huge mess. I needed a system that was easy, organized and aesthetically pleasing.

This past weekend we headed to Target to spend a gift card that we received for Christmas. I perused the office supply section. This lovely metal magazine holder caught my eye. Sitting close by was a package of beautiful gold metallic file folders from Nate Berkus for Target. The folders fit into the magazine holder really well. The light bulb went off in my head and realized that this would be the perfect solution  to organizing my messy mail area.
Here is how I labeled my folders, 

1. Bills to Be Paid
2. Car Stuff
3. Coupons
4. Financial To Be Filed: Bank, Investment, and Tax Papers
5.  Health
6. Personal: Birthdays Cards and Letters
7. Project Life: A place to store everyday ephemera before I sit down to scrapbook.
8. To-Do: Where I keep items that I need to deal with at a later time.  For example, I have some life insurance information that needs to be changed because they spelled my name wrong. 


Placing the magazine holder on it's side makes the folders easier to take in and out. 

This system has been working well. Before I put the mail in the folders, I open the envelopes and throw out any items that we don't need. We have a trash can right below this table. When it comes time to pay bills, Michael will only have to pull out the bill folder instead of hunting through a huge stack of papers and wasting precious time. Sorting the mail takes no time at all! Now the table looks clean and organized. I have room to add a vase of flowers or possibly a picture in a frame. 

Using items in ways other than their intended purpose can be a lot of fun. In what ways have you used everyday items in creative ways?


Tuesday, January 19, 2016

Orange Banana Poppy Seed Muffins


There are a plethora of cookbooks on the market today. Everything from cakepops to gluten-free recipes. These cookbooks are as much of a display of fine photography as they are cooking directions. On my shelf I have more than my fair share of cookbooks. Looking through my mother's cookbooks was a hobby of mine as a child. All that practice planning pretend menus served me well years later while studying hospitality in college. 

While enjoying sophisticated and complicated dishes is wonderful, there is something to be said about simple and traditional recipes from friends, family and neighbors. Those tried and true recipes shared through family and the community.

I collect community, church, and family cookbooks. Most of my collection is centered around areas where we have personal connections.  We have books from Vermont, Minnesota, Wisconsin, Ohio and Kentucky. 

While visiting with my mother-in-law over Christmas, she gave me a few cookbooks to add to my collection. One of books came from her side of the family. Included in the back was a family list of names, dates of birth, marriage, and death. Family history is something that I am slowly becoming more and interested in. Michael has become the family historian over the past couple of years. 

Per (Isakson) Isaacson was born 9-23-1860 in Alanas Jamtland, Sweden. Elisabet Ulrika Lofren was born 11-26-1864 in Torsjo, Angermanland, Sweden. Per and Elisabet were married 12-26-1882. They had thirteen children. Per passed away 2-14-41, he was 81 years old. Elisabet passed away 4-23-1933, she was 69 years old. They are both buried in Betheseda Cemetery at Strandquist, MN. 


This book has many recipes that I am looking forward to trying. It will be fun to have a connection to my husband's relatives.  I am hoping to share favorite recipes from my collection of community, church, and family cookbooks. First on the list is Orange Banana Poppy Seed Muffins.

Peel and slice two ripe bananas. 


Mash bananas using a potato masher. 


Add 1 egg, 3/4 cup sugar, vegetable oil, and grated orange peel. 


Stir until combined. 


In a separate bowl combine flour, seeds, baking powder and salt. 


Combine flour and banana mixtures. 


Line pan with paper liners. Spoon mixture into liners until each cup is 3/4 full. 


Bake at 375 degrees from 20 minutes, or until toothpick comes out clean. Mine took about 18 minutes. 


Combine 1 1/4 cups powdered sugar, 1/4 cup orange juice, 1 tsp. orange peel and 1 tsp. vanilla to create a glaze. 


When the muffins are barley warm, drizzle with orange glaze.


These muffins are sweet and would make a delicious breakfast or dessert. 


Orange Banana Poppy Seed Muffins
Jan Isaacson, Philex Isaacson’s Daughter-in-law

Muffins
2 ripe bananas, peeled
1 egg
¾ cup sugar
¼ cup vegetable oil
2 tsp. orange peel
2 cups flour
1 ½ tablespoons poppy seeds
2 tsp. baking powder
½ tsp. salt

Orange Glaze
1 ¼ cup powdered sugar
¼ cup orange juice
1 tsp. orange peel
1 tsp. vanilla

Mash bananas well. In a medium bowl, mix bananas, eggs, sugar, oil and peel. In large bowl, combine flour, seeds, baking powdered and salt; stir in banana mixture until well blended. Spoon batter into sprayed muffins tins (12) or into muffin tin with paper liners. Bake at 375 degrees for 20 minutes, or until toothpick comes out clean.  Set aside to cool. While barely warm, drizzle with orange glaze.


Hope you enjoy this recipe. If you make these delicious muffin, I would love to see them. Connect with me on Facebook, Twitter and Instagram.

Happy Baking!!!

Thursday, January 14, 2016

Scrapbooks and Journals and Planners! Oh my! Part One: Project Life


Scrapbooking in some form or other has been a hobby of mine since my teen years. I remember seeing decorative scissors for the first time and completely falling in love. I was one of those people who cut my photographs into fancy shapes. All of my pictures from 1998 until 2003 have lovely ornamental edges :D

In 2008 I was perusing an issue of Creating Keepsakes Magazine and saw an advertisement for a scrapbook kit called Project 365. The premise was to take a picture a day to document everyday life.


I was immediately drawn to the sleek design and the divided page protectors. I always struggled where to place things on traditional scrapbook pages. The idea of being able to slip your photos and journaling into the pockets seemed simple and easy. The perfect way to document  life's little  moments, not just the birthdays, holidays and vacations.


During that first six months of that year I took a picture each day. Then life got busy and I slacked off. I am so glad that I have those six months, but I was a little disappointed that I didn't finish out the year.


In late 2012 Project 365, now called Project Life began to get really popular. The company was preparing to sell  kits in major retailers Michaels and Hobby Lobby in early 2013. Project Life was all over the scrapbooking blogs and message boards. I decided to give it another try. During 2013 I created a two page spread for each week, which filled up two 12 X 12 albums. I adore those albums and love looking back through them. The process of keeping up with a weekly layout was really overwhelming, as was the thought of storing two large albums each year.

In 2014 I began documenting life by the month. I didn't set a goal of how many pages I was going to do each month. I document what I want and when I want. Most of my photographs are from my phone. My albums are a glorious mishmash of Facebook status updates, tweets, memes, current world events, photos, and ephemera. Some months may have four photos and other months one-hundred and six. I am okay with this anything goes style.

Here are 15 Things I Document in my Project Life Album


1. Current Viral Phenomenon

Do you remember "THE DRESS" from last winter? I found  the pictures on Facebook and printed them out. I still have no idea how my husband only saw white and gold.


2. Fun Mail

Post cards, note cards, and thank-you cards go directly in. I don't bother adding them to a page protector.

3. Copies of Newspaper Clippings


4. Copies of Family Recipes


5.  Movie Posters

6. Books That I'm Currently Reading

7. Favorite Quotes


8. Day-in-the-Life


9. Internet Memes


10. Fun Packaging

11. Business Cards


12. Pictures of What I'm Pinning on Pinterest


13. New Recipes


14. Photo Challenges  

You have probably seen on Pinterest different photo-a-day challenges. Each day there is a photo prompt that is open to your own creative interpretation. .


15. Lists

Project Life is so versatile. At it's simplest form you can just add photos and journaling to the pockets and call yourself done. Add embellishments! Create cards using photo editing software Document your current life or tackle that box of photos that your Grandmother gave you. It's really up to you!

The most important part for me is that I have found a system to collects my photos and memories. My photos aren't just sitting in the "cloud" somewhere. My stories are being told. Everyone has a story to tell. How are you going to share yours? 


Want more information about Project Life? Here are a few links to get you started!

1.  Project Life-Discover the System 
2. Becky Higgins' Blog-The creator of Project Life
3.  Ali Edward Blog - A popular memory keeper and author
4. The Answers to All Your Project Life Questions-Fantastic post by blogger and artist  Elise Blaha Cripe
5. Catching Up on Project Life-How to Keep from Giving Up When You're Behind- post by Traci at Traci Reed Design
6. Project Life App-Available in the App Store. Coming February 2016 for Android.


Monday, January 11, 2016

Menu Plan Monday: January 10th- 16th


Sunday: Pizza Hut Pizza

Michael likes to eat pizza while watching football. Go Pack, Go!

Monday: Chili Baked Potatoes

Super simple meal. I make a few baked potatoes. I serve them with canned chili, cheese, jalapenos, and sour cream. We have some 5-Layer dip leftover that I might put out, unless Michael eats it all while watching the game! :)

Tuesday: Taco Tuesday

Wednesdays: Waffle Wednesday served with Turkey Sausage

Thursday: Hamburgers and Sweet Potato Fries. 

Friday: Classic Beef and Tomato Mac Soup

Saturday: Out to eat in Lexington


Thursday, January 7, 2016

Things to Think About When Goal Planning: Free Printable Goal Planning Sheet


It never fails! Every year the week after New Years the January blues start to set in. The shiny and sparkly holiday season is over and the dark reality of winter has set in.  The exciting break in routine over Christmas vacation is gone, replaced with having to wake up early to warm the car and scrape the windshield.  I actually really love winter. I may be the only person in all of Kentucky who loves snow.Trudging to the car on those insanely cold and dark winter mornings is not my idea of winter fun. 

Check out the selfie that I took trying to convince myself that waking up at 5:30am on a Monday is the most wonderful thing ever. Don't let the smile fool you!

Lists are my thing!  Crossing something off of my to-do list is gratifying. I may even put waking up and taking a shower on my list. Some days those tasks are hard to accomplish! The act of goal setting and getting things done is extremely motivating for me. 

Goal setting is important any time of year, not just for the new year. I set daily goals, weekly goals, monthly goals and yearly goals. While I am constantly setting goals, the new year does offer a new beginning, the perfect opportunity to look back and assess your life. 

Here are a few tips for setting goals...

#1: Decide what isn't working

Think about your habits and those actions that make life more difficult. For me, I have the habit of procrastinating on my lesson plans, leaving them unfinished until Sunday.  Monday morning I have to fight the crowds in the copy room to get my materials printed. It's not a great way to start off my week. One of my goals this year is to have my lesson plans done by Thursday and have all my copies made by that afternoon. It's a realistic goal, but is going to require me to spread the planning and prep out throughout the week.

#2: Choose what is working for you

What is working for you? If you find going to bed earlier works for you then continue doing that. Take a look at the actions and habits that are working in your life and resolve to keep doing those things.


#3: What do you want to add to your life this year?

For me this is the most fun step in the process of goal planning. Think about the different areas in your life. What is important to you? What hats do you wear? Are you a wife? Do you work?  Being a wife, a Christian, a reader, and an employee are several of the hats that I wear in life.  When setting goals I take a look at the roles that I play and choose goals that fit with those roles. Serving other people is important to me, so I set a goal that I will take part in 1+ service activities per month. Decide what is important to you and tailor your goals to fit those roles. 

When choosing your goals remember the acronym S.M.A.R.T ! 

It's also important to remember to not set too many goals., I find it easiest to choose only one goal for each of my life roles, at the MOST!  Honestly I may not have goals set for each life role at the same time. Start with a few goals at a time, adding more later. 


Setting and accomplishing goals can become addicting. Remember to spend some time asking yourself if what you are doing is working or not.

What are some of your goals for this year?  


Here are a few links to articles about living life on purpose.